
Mastering the Art of Exposure: From Highlights to Histogram
In photography, exposure isn't just about lighting a subject. It's about striking a balance involving multiple variables, each influencing how light interacts with your camera sensor. Let's dive deep into understanding the core components of exposure and the tools that help photographers achieve the perfect shot.
Foundational Concepts
Exposure refers to the amount of light that reaches your camera sensor. Too much light results in an overexposed image, where details are lost in the brightest parts. Too little light leads to an underexposed shot, with the loss of details in the shadows. The key is to find that sweet spot where the subjects are illuminated just right.
1. Highlights & Shadows: More Than Light and Dark
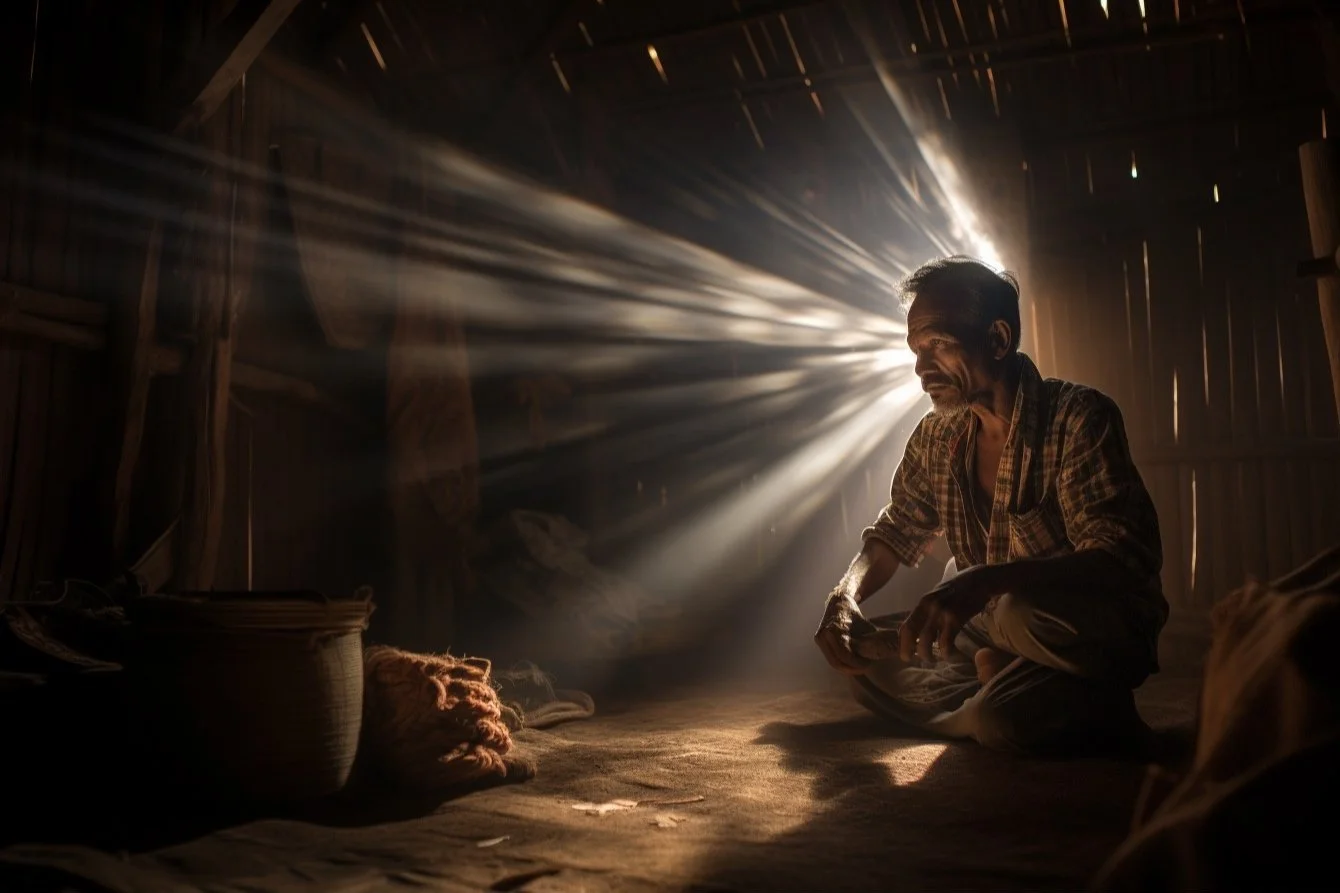
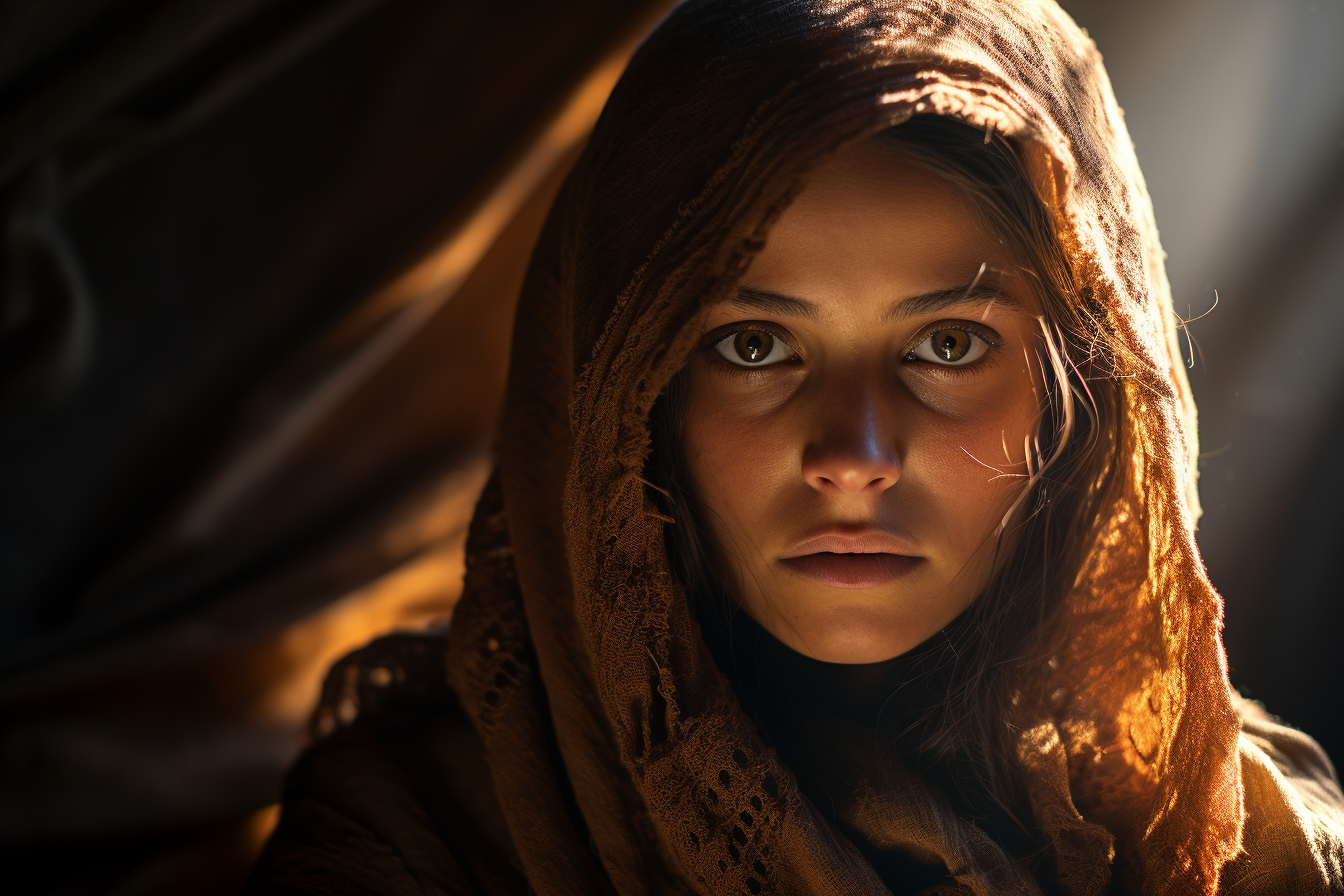
Highlights are the brightest parts of your photo. In a landscape shot, it could be the sun reflecting off a water body or the bright sky. Highlights convey mood, draw attention, and provide contrast. Shadows are the darkest areas in your image. They define depth, shape, and form. A portrait with a strong shadow might convey drama or mystery, while soft shadows might suggest serenity or calmness.
2. Whites & Blacks: The Extremes of Light
Whites, unlike highlights (which are the brightest parts), refer to the brightest point of the image before it clips to pure white. Adjusting the whites can help in making the image pop without overexposing it. Blacks are the darkest points before it turns into pure black. Tweaking the blacks in post-processing can add depth and contrast to an image.
3. The Histogram: The Exposure's Blueprint
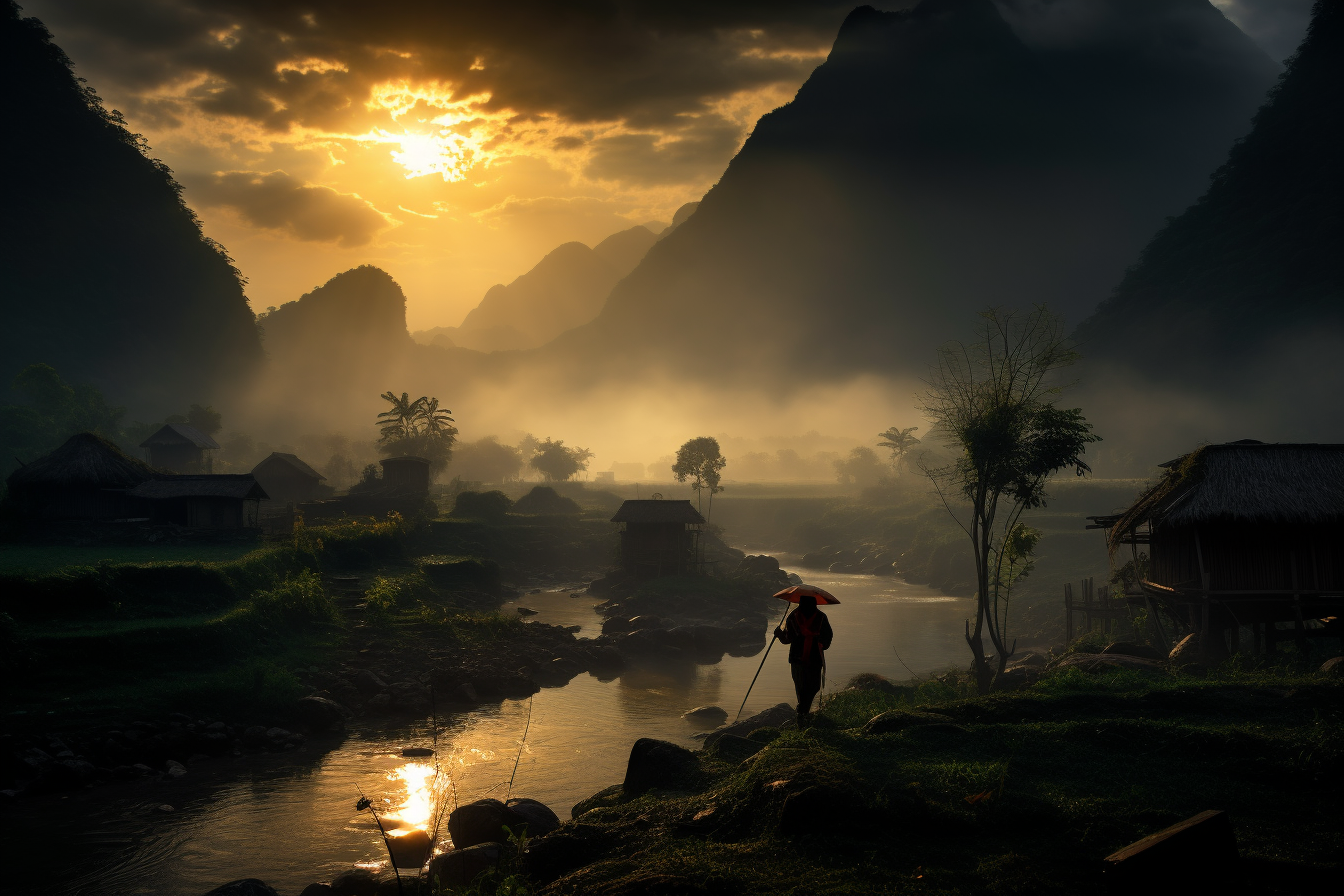
A histogram is a graphical representation of the tones in your image. On this graph, the leftmost side represents the blacks or shadows, the rightmost side is the highlights or whites, and the middle is the mid-tones. A well-balanced histogram spreads out across the chart, indicating a wide dynamic range. Peaks towards the right signify a lot of bright areas, whereas peaks on the left suggest a dark scene.
Understanding the histogram is pivotal. It ensures you have details across all tonal ranges, prevents clipping in highlights, and avoids crushing the shadows. It's important to remember that it's okay to have histograms skewed to the left (as with the photo above) or the right. Using the photo above as an example, you don't want the details in the shadows to draw attention away from the more important river and sky. The silhouetted mountains also add a sense of drama.
4. The Trinity of Exposure
There are many articles online discussing the ‘exposure triangle’ but we'll briefly touch on it here. Three primary settings control the exposure of a shot. Aperture refers to the size of the lens opening. A larger aperture (smaller f-number) lets in more light but reduces the depth of field. A smaller aperture (bigger f-number) allows less light but increases the depth of field. Shutter Speed is the amount of time the shutter is open. Faster shutter speeds freeze action but let in less light, while slower speeds can cause motion blur but allow more light into the sensor. ISO is the camera sensor's sensitivity to light. Higher ISO values can brighten an image but may introduce noise. Lower ISOs result in cleaner images but may require longer shutter speeds or wider apertures.
To ensure you produce an image that is clean and natural looking, it is pivotal that you attain the correct exposure in the field. This will result in less drastic corrections in post-processing. Gone are the film days when you had to wait days to weeks before you assess your exposure. Take a photo and check your exposure. Make changes to your settings until you achieve that perfect shot. If you’re in a situation where lighting is unlikely to change significantly, consider taking some test shots to prime your settings.
As a general rule of thumb, it's better to have your image slightly underexposed than overexposed. This is because It's easier to recover the detail from the shadows of an underexposed image than it would be to regain detail from the highlights of an overexposed image.

How to Utilise Light
Just as a painter uses varying shades of paint to bring depth and dimension to their canvas, a photographer relies on the intricacies of highlights, shadows, blacks, and whites to craft a compelling image.
1. Balancing Highlights for Vividness: Controlling Brightness
Overly intense highlights can distract and overpower the primary subject. Ensuring they're prominent but not overwhelming. Try strategically positioning highlights near focal points to guide the viewer's attention.
2. Crafting Depth with Shadows: Leading Lines
Use shadows as leading lines to guide the viewer's eye through the image. This is especially powerful in landscape and architectural photography. Create depth by placing shadows behind objects or people to give a three-dimensional feel to the image. If your shadows are too dense, lighten them slightly in post-processing to unveil hidden textures without losing the depth they bring.
3. Adding Drama with Blacks: Embrace Silhouettes
Position your subject against a brighter background and expose for the background. This technique renders your subject in deep black, creating a dramatic and often emotional silhouette. Consider accentuating contrast in your photo. In scenes with natural contrast, deepen the blacks slightly to emphasise this and make your subject pop. Remember to retain some detail. Overusing blacks can lead to loss of detail, especially in areas like hair or textured fabrics.
4. Bringing Clarity with Whites: Space and Atmosphere
Use areas of pure white to bring an airy feeling to images, especially useful in minimalist compositions. Even if whites are used minimally, ensuring they are pure and clear in post-processing can drastically improve image quality. Avoid overexposing an image. Too much white, especially in areas that should contain detail, can lead to a flat image.
Scene Analysis
Every photograph begins with a vision, a mental picture of what the final image should convey. One of the foundational steps in this process is determining the distribution of light and dark within the frame.
Understand the "why" of your photo. By understanding the purpose, you can guide the viewer using light and shadow. It also allows you to identify what elements and details are important and which ones aren't. The interplay between light and dark areas can drastically influence the mood of the image. Bright, evenly lit images often feel upbeat and cheerful, while those with more pronounced shadows can feel moody and dramatic. Pre-visualizing prevents overexposure or underexposure in critical areas of your image. Knowing in advance where you want the highlights and shadows can help you adjust your camera settings accordingly.
Before setting up your shot, take a moment to scan the entire scene. Identify natural sources of light and shadow and consider how they interact with your main subject. Think about the absolute brightest and darkest points in your image. Will these be distractions, or can they be used to enhance the composition?
Natural lighting, especially outdoors, can be unpredictable. Clouds move, the sun's angle changes and shadows shift. Part of effective mental mapping is also being prepared to adapt. Try to anticipate changes. If you're shooting during a time when light is changing rapidly, such as sunrise or sunset, continuously update your mental map to account for these changes. Sometimes, waiting for the right light can make all the difference. If you've mentally mapped a shot but the light isn't cooperating, consider waiting or returning at a different time.

Image Analysis
Before diving into edits, study the unprocessed image. Recognize its strengths and weaknesses. What does the image already possess, and what does it lack in relation to your vision?
Set Anchor Points by Identifying key elements in your image that will remain consistent, such as a subject's face or a horizon line. These anchor points can guide your edits and ensure the photo is edited in relation to those points. Sometimes, jotting down or sketching your desired outcome can be beneficial, especially for complex edits. This can serve as a roadmap as you navigate through your editing software. If you're aiming for a specific style or mood, having reference images can help. They provide a tangible benchmark to guide your adjustments. When in the editing zone, minimize distractions. This helps in maintaining focus on your pre-visualized outcome and not getting sidetracked by extraneous elements.
Conclusion
The interplay between light and dark gives a photograph its depth, emotion, and narrative. By mastering the use of highlights, shadows, blacks, and whites, photographers can craft images that resonate, tell stories, and truly capture a moment's essence. Whether you're behind the lens or in front of the screen editing, a keen understanding of these elements will serve as the foundation of every breathtaking shot you take.